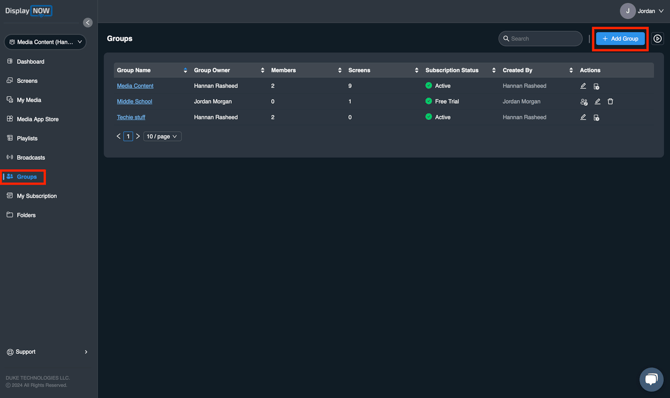
Step 1: Navigate to Display NOW Manager > Groups.
You can group things by office locations and teams members. We'll take this for example,Media Content, Middle School and Techie stuff groups.
Click on "Add Group."
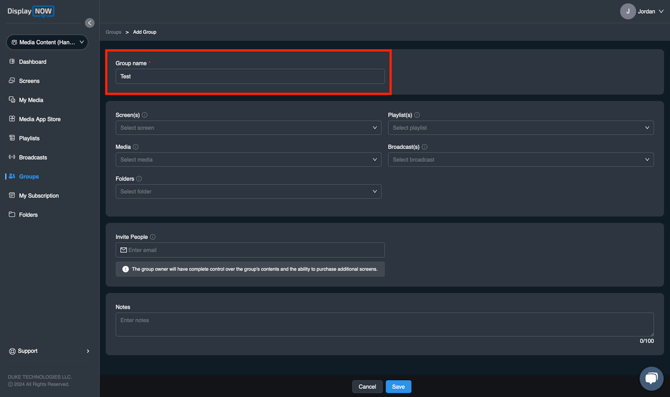
Step 2: Enter Group Details
- In the Group name field, enter a name for your group. (e.g., "Test")
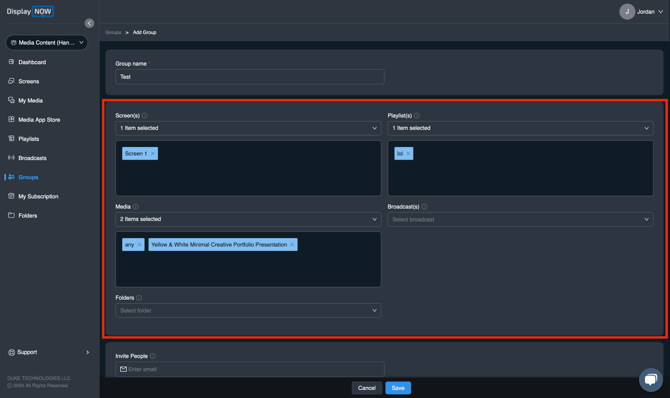
Step 3: Select Screens, Media, and Playlists
Here, you can select the media you've uploaded to the Display NOW Manager. If you haven't uploaded anything yet, you can do so later after creating the group.
- Under Screen(s), click the dropdown and select the screens you want to include in this group.
- Under Media, choose the media files you want to add.
- Under Playlist(s), select a playlist if you want to schedule a sequence of content.
- (Optional) Select Folders to organize content.
- (Optional) Choose Broadcast(s) if you want to add a broadcast.
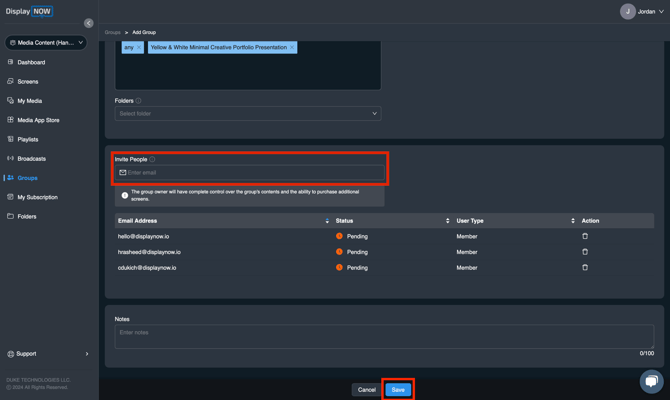
Step 4: Invite Members to the Group
- In the Invite People section, enter the email addresses of the users you want to add.
- The group owner will have control to add and manage screens in that group.
Step 5: Save the Group
- Review your settings.
- Click Save to finalize the group.
Your group is now set up. Team members can join by accepting the invitation sent to their email, or by navigating to the "Groups" section, selecting the group, and accepting the invitation directly from there.
Once the invite is accept by the group member, their status will change from pending to active. They can then log in to the Display NOW Manager using their own credentials and make edits as needed.