How to setup Kiosk Mode in Windows.
- To setup Kiosk Mode (Windows Assigned Access), download the app from the Microsoft Store if you haven't already. Search for "Display NOW Digital Signage Player" and look under Apps. It's in the Business category.
- If you aren't sure, check your Start menu listing or check the store. If it's already installed, the store will show a Launch button.

Step 1: Navigate to Setup a kiosk (assigned access) in Settings

Step 2: Click setup a Kiosk, name your Kiosk user and then select Display NOW in the app listing.
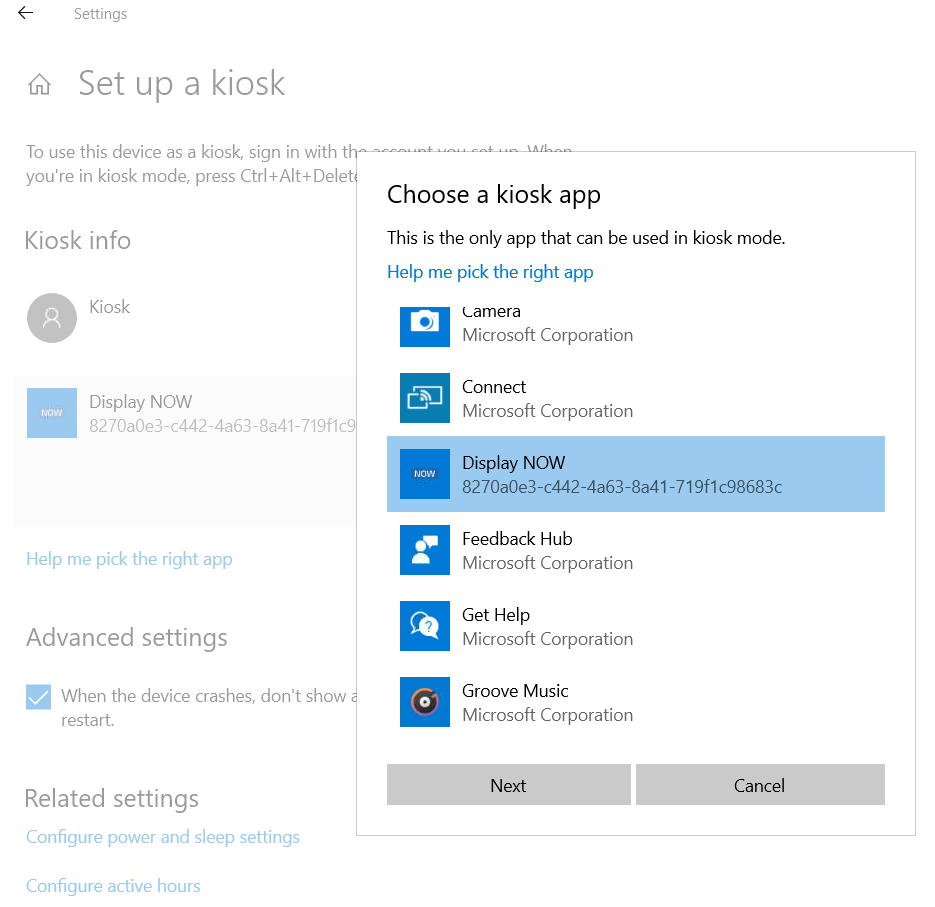
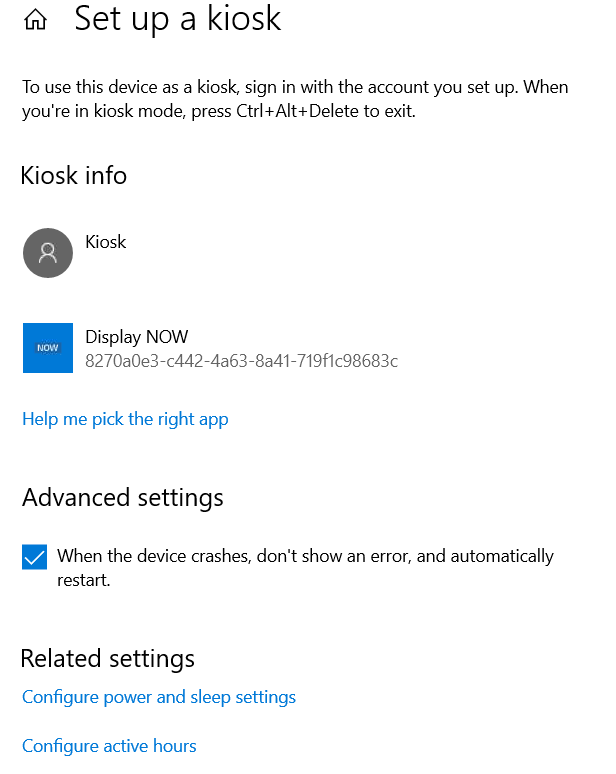
Step 3: Essential settings configuration
- Be sure to check the box under advanced settings to ensure the device will automatically restart silently if there's an error or an update.
- Next, configure your power and sleep settings.
- Finally, configure active hours if your organization doesn't do this for you. This will help ensure your Display NOW Display doesn't go to sleep when it should be presenting content. With Kiosk mode, you can (and should) apply Windows updates freely - but we suggest you time them for off-peak hours.
Step 4: Sign-out and sign into your computer with the new Kiosk user.
- If you sign-out of windows, the Kiosk user will automatically log in after a period of time (usually within a few minutes).
- Each time your computer restarts, the Kiosk user will automatically sign itself in and the presentation will begin via the Display NOW app. No more annoying notifications or pop-ups blocking your content!
- This also allows you to maintain security; access, Windows updates, etc as access is restricted to just the signage app.
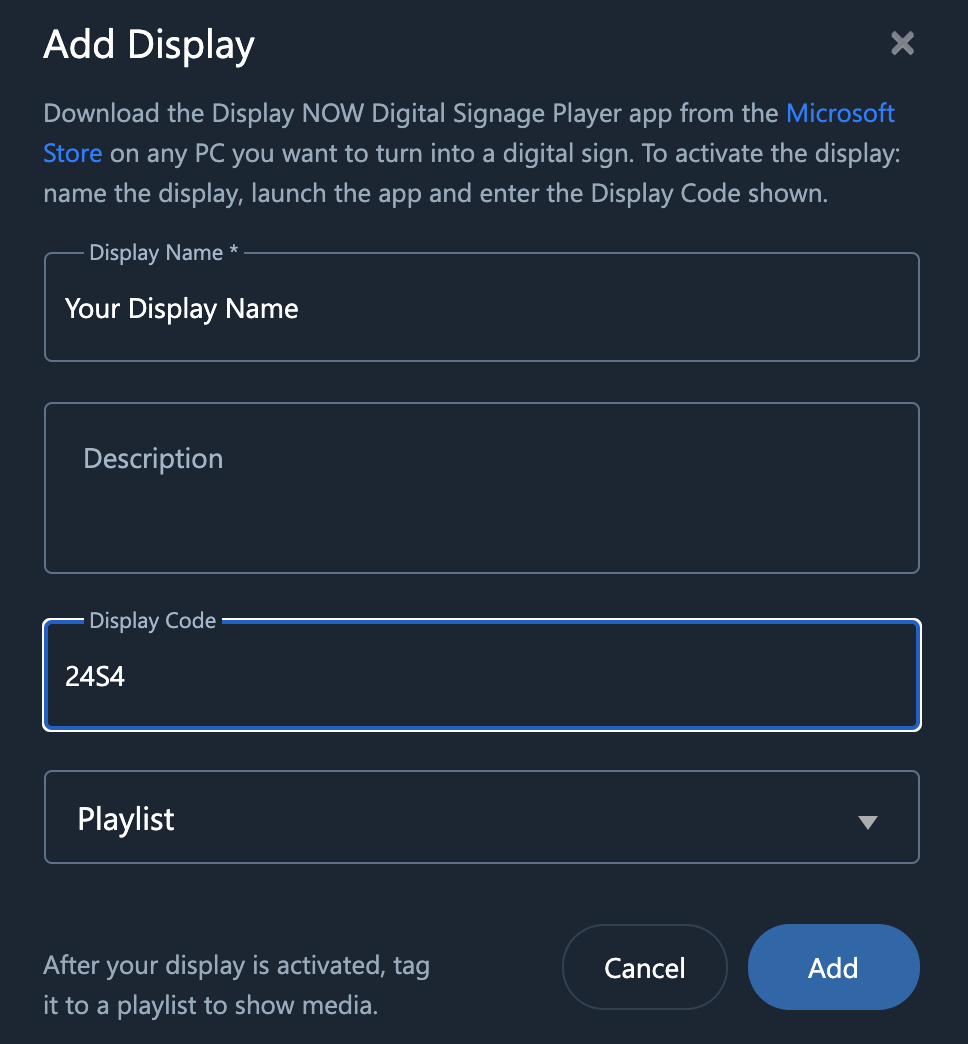
Step 5: Add your Display to Display NOW Manager for remote management.
- Navigate to Display NOW Manager (manager.displaynow.io) on another device, like your phone or a laptop.
- In the Displays tab, you'll see a + Add button. Click that to add a Display.

- Enter in some identifying information followed by the Display Code.
- Next, add media!